
Working with Google Ads in Hashnode Blog
Integrating Google Ads in your Hashnode Blog


Google AdSense is a program managed by Google that provides text, photos, videos, or interactive media advertising targeting website content and the public through Google website publishers in the Google Network of content sites. Google manages, sorts, and maintains these adverts.
Google Adsense is one of the best advertising management solutions available. It’s not the only one, but you’ll be hard-pressed to find a program that’s more intuitive and efficient.
Of course, if you’re new to the blogosphere and publishing world, you probably have no idea where to start when it comes to monetizing your ads. In this article, we’re going to walk you through the steps of applying for a Google AdSense account and the mistakes you need to avoid making.
I. Creating a Google AdSense Account
So ensure that you meet all the following standards before applying to Google AdSense:
- You must be at least eighteen years old.
- You don't already have an AdSense account linked to your Gmail account.
- You have a functioning website that complies with Google's terms of service .
- Your website has been up for at least three (3) months.
- Your website's content is current and relevant; you should have at least 30 articles published that are useful to your visitors, as well as a contact page and a privacy page.
- You have a large volume of website traffic (no minimum is required, but the greater the better).
The first step is to apply for AdSense on Google's website. On the first page of the application, you must enter the URL of your website, your email address, and whether or not you want to receive Google's emails.
Following the completion of your basic information, Google will drive you to the next phase of your application, which will appear slightly different — especially since Google's layout changes frequently.
The information asked, however, remains the same, so be prepared with the following:
- Your company name or the name under which your account is held Your contact information
- Your physical address for correspondence
- Your electronic mail address (from your Gmail account)
- Your contact information
II. Verifying Your Site for Google AdSense
Step 1: Get Your AdSense Code for Your Site First, you need to sign up for a Google Adsense account and get an AdSense code for your site.
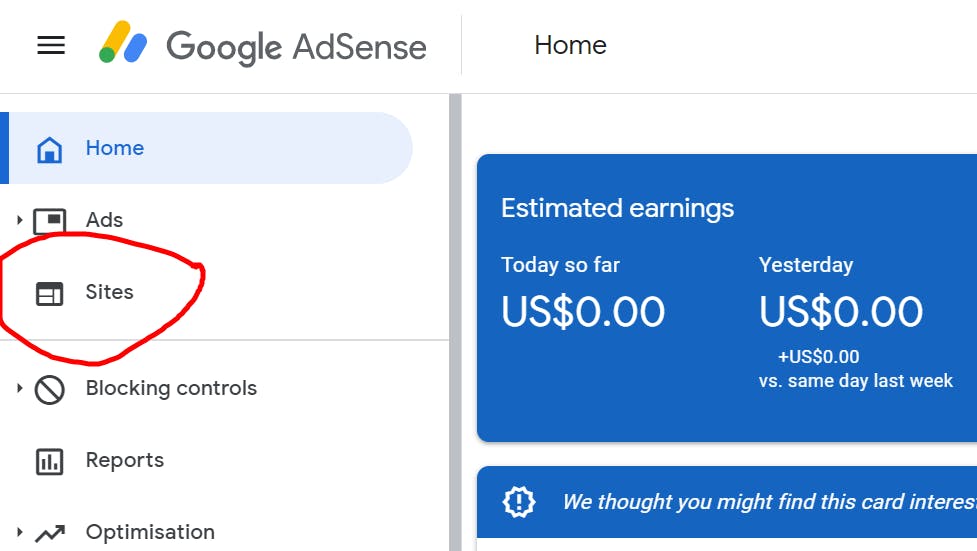
- Go to Google AdSense.
- Click Sites in the left sidebar.
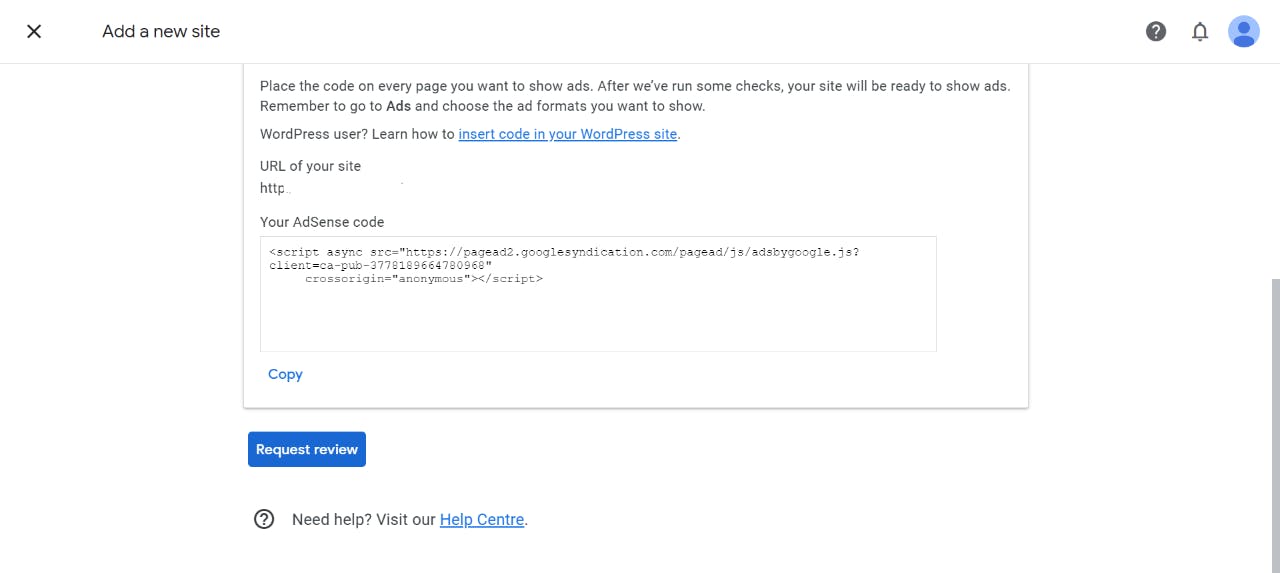
- Click Add site.
- Enter the URL of your site.
- Click Save and continue. Note: If you get an error, delete "www" from the URL.
- Click Copy under Your AdSense code.
Step 2: Add Your AdSense Code to Your Site
After you get your AdSense code, you need to add it to your site as a custom code.
- Goto your Hashnode Blog Dashboard.
- Click on Integrations.
- Now paste your AdSense Code under the Meta Tags Section.
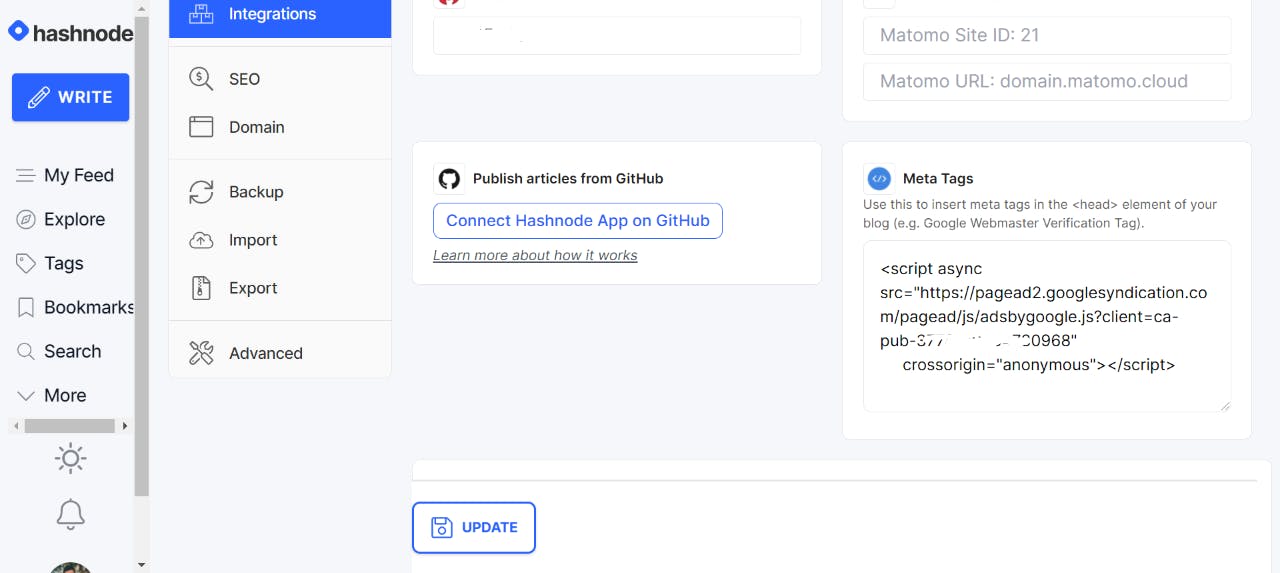
- Now go back to AdSense and click Request Review.

- Wait for a few days for approval of your Adsense Account.
III. Adding Ad Codes To Your Blog
Step 1: Getting A Responsive Ad Code
- Goto Ads section in your AdSense Dashboard.
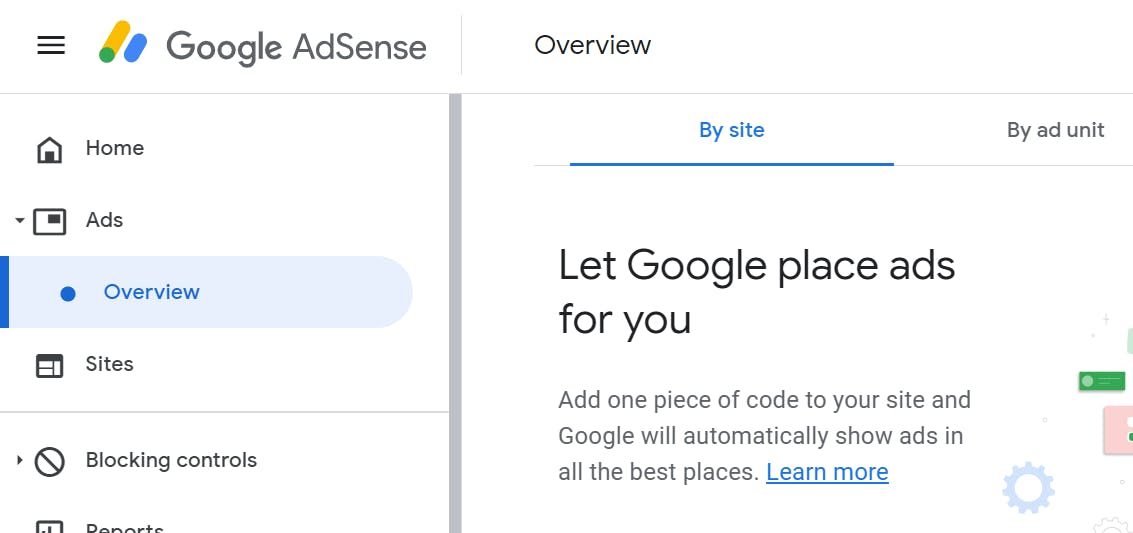
- Click on by ad unit in the header menu.

- Now select the ad type you want to display in your blog under Create new ad unit.
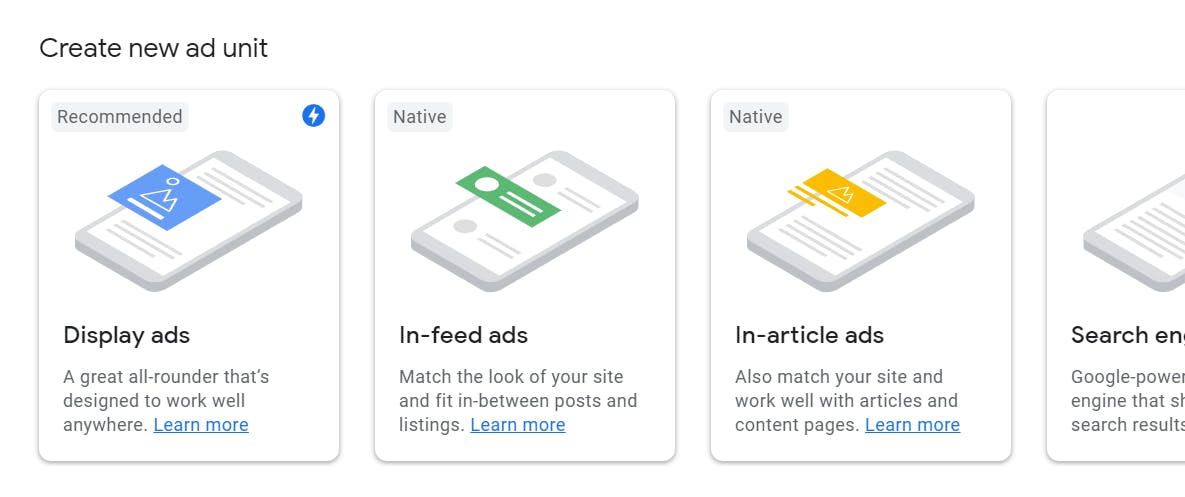
- Let's Go with Display ads.
- Now enter the required details like ad unit name.
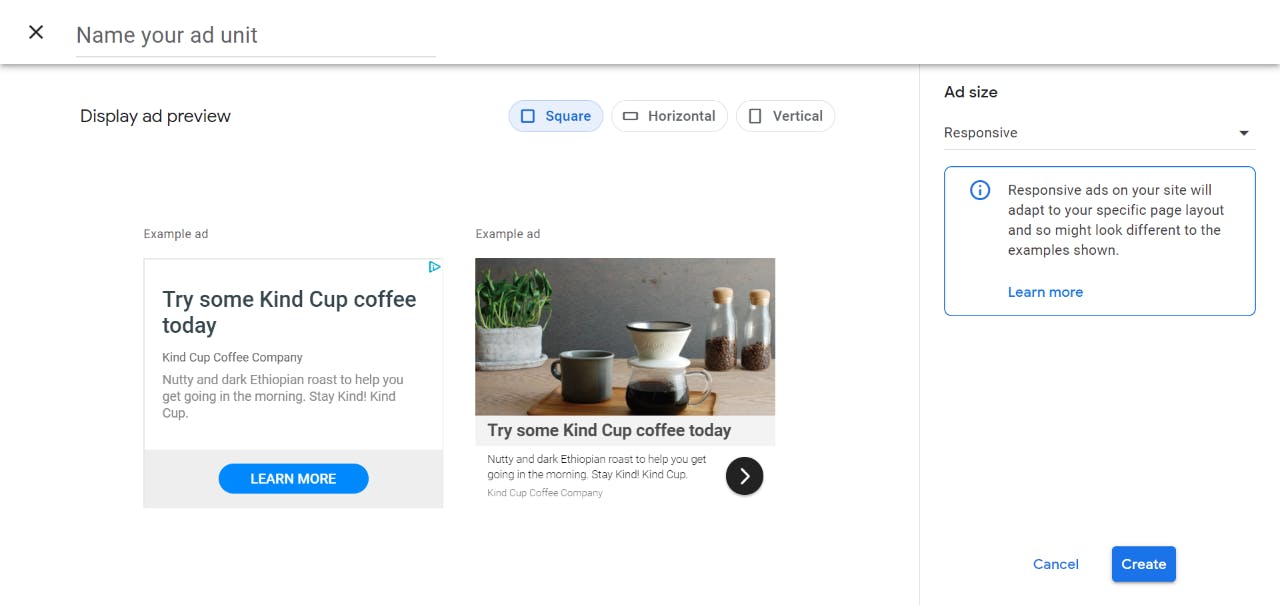
- Now click on Create.
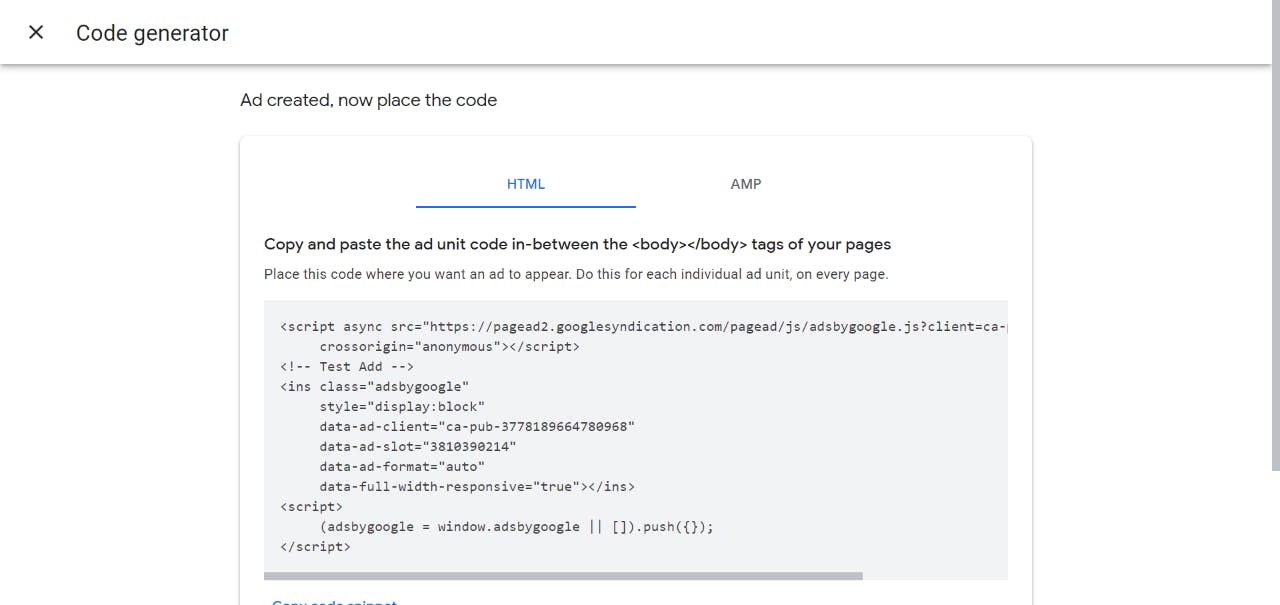
- Now copy the code snippet and click Done.
Step 2: Adding the Ad Code to your blog.
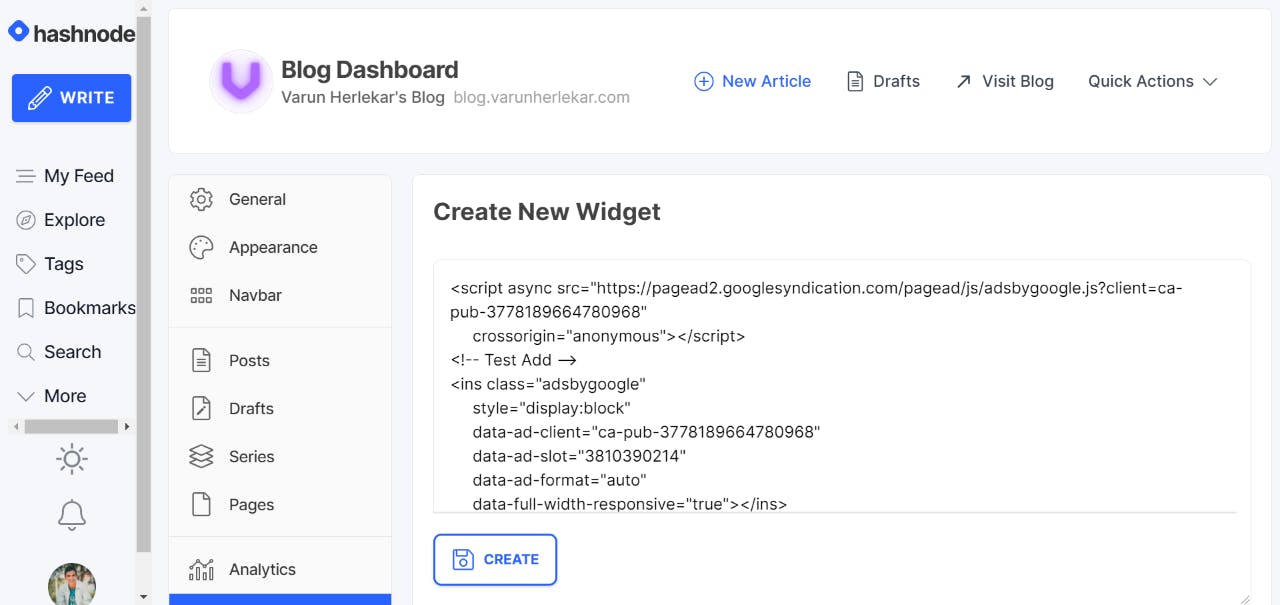
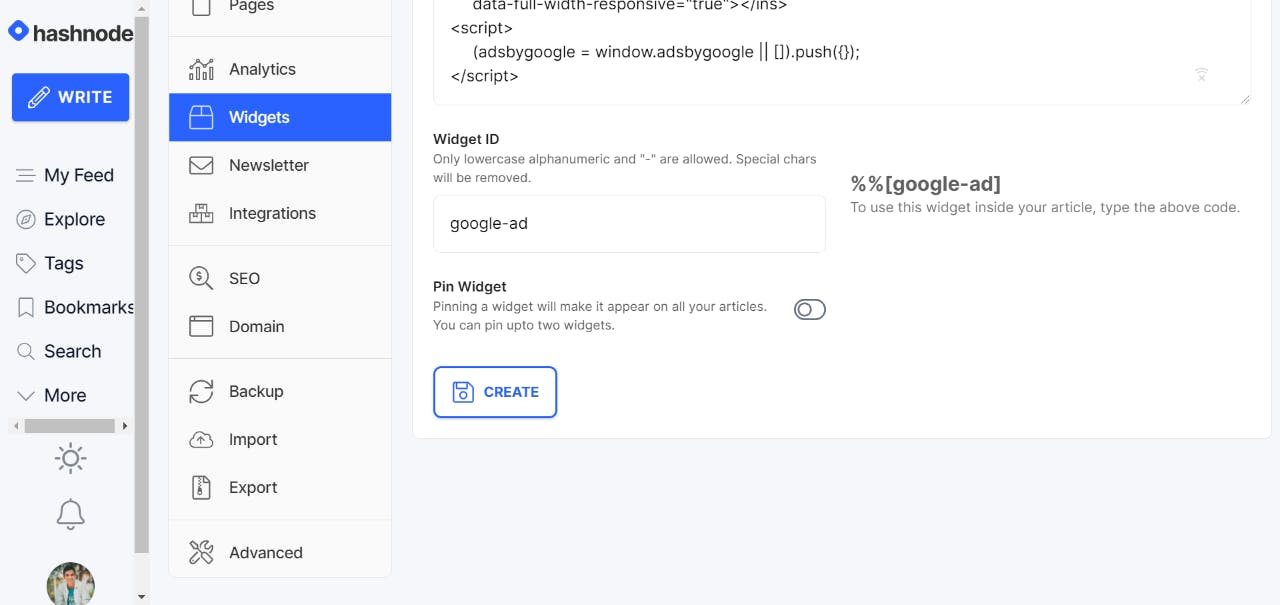
Now Goto your Hashnode Blog Dashboard --> Widgets --> Add New Widget.
Paste the Ad Snippet and enter any widget id as shown below and click the Create Button.